The Nautical World...

Showing posts with label neptune. Show all posts

Monday, March 14, 2011

Oars, row hard, row fast! How to make 'em!

A beautiful week here on Galveston Island and the 175th anniversary of Texas Independence and we are well into Texas History Month! If I get some time later I'll post up some Texas history.

So, I have been rowing the channel lately, but on borrowed oars. My friend Seth of JPL Marine Labs made them. They were stout and beautiful. He used an epoxy lamination process and came up with something nice. He was commissioned to build them for a fellow boatbuilder and now his boat is launched and he needs them. Long story short--I lost my loaner oars :(

But with every hatch closed another one down the p-way flies open (and needs securing) so I set about building my own.

In these plans they leave them square near the handle


That picture right above is the plans/template I'm using. I got it off A.B.B. or Amateur Boat Building website (click to follow). The plans are a pretty inventive and cheap way to make your own. Just grab a 1"x6"x7' (I enlarged mine to 8') plank of oar-worthy wood (southern pine, ash, etc.) draw and cut out the pattern. Then take the excess scrap and glue it back onto the main part. Make sure you don't skimp on the glue, plenty of clamps, and let it cure for at least a day (I have found that when using Titebond III if you let it weather a few days, it is indestructible).

Untapped beauty

You will end up with something like the picture above. A gnarly, ugly, hunk of wood that you would never in a sober mind imagine would turn out that resembles anything close to a caveman's club, let alone an oar. But alas, your patience shall be rewarded, grasshoppy!

You take this blank and put a centerline on all four sides. From there you make another mark between the outside edge and the centerline. There will be two marks, one on each of the centerline. Do this on both the top most and bottom most portion of the oar, connect the lines, and repeat this on all four sides.

This is my back porch workshop!


Now the fun. Grab your planer and shape it down to an octagon... eight-sided polygon... a stop sign... get it? Then repeat the same process with all the new faces, or do what I did and eyeball it and make the eight sider a sixteen sider. By that I mean plane all eight edges down to create a shape with sixteen. At this point you can sand it and plane it down until a perfect circular oar.

before and after of the handle


On the face of the oar, plane down the outside edges to about a quarter of an inch.

Before shaping and after initial
cut. Once you sand them, they
get purty real fast!

Now sand everything down (inclunding the handle) and you're done. Lot of work, but a very good product. I will put some finished pictures of mine once I finish shaping, sanding and varnishing them. If you are interested in purchasing any, shoot me an email at NeptuneNation@Gmail.com, and I'll quote you a very reasonable price. I'm not trying to make money here, I just love to do this stuff!

Questions, comments, concerns? Write me, Brett

Water is Life!

Brett

Sunday, November 21, 2010

Finally a post (and video) about the boat!

Happy Thanksgiving everyone! Here is the first video in a series of videos about to be published. Let me know how you like them, leave comments or email me~ Brett


Friday, October 15, 2010

Scuba Adventure, Dory Build, and School Woes...

It has been over a week since my last post, and I do apologize, busy, busy, busy!

Congrats to my fair lady, Kelly, she is now NAUI open water certified! We had a great weekend at Mammoth Lake finishing up our cert. Actually, is was a bit of a debacle...


When we surfaced after our first dive on Sunday, I looked over to Kelly and I saw the most unsettling vision ever. Her mask was just completely filled with blood and snot. The best part was that she didn't know yet. So did I try to see what was wrong and make her feel better? Did I suggest that she not dive our final dive in order to look out for her safety? No way. I told her "babe, I think your nose is bleeding a little bit," and quickly whisked her away so the instructor wouldn't see. I didn't want the instructor to see because then the last dive would get canceled and we would have to go back out to that dirty, muck-water pond and fork over another 40 dollar entrance fee. "No babe, your nose isn't bleeding that bad, you'll be fine (hand firmly gripping wallet)." I know it sounds callous, but wait until you see the underwater pictures of this place. I felt like I was scuba diving in a bowl of miso soup.
Kelly was tough though, she knew what was at stake and she soldiered on. Nose full of snot and blood, she completed the final dive-Victory! Well, not exactly, still waiting on the results of our written test, but we should find out soon. In the mean time, check out Island Divers, Tom is a real cool dude and can help with all your diving needs.

Isn't this a blog about a boat? Yes, but patience grasshopper.

So busy this week, I took a test in American History of Seapower... it was ridiculous. I wrote 11 pages I think. My main essay was 6 pages. That is too much, but interesting stuff. Check out this guy Alfred Thayer Mahan. Pretty visionary, maybe we should listen to him... Then I just had a test in Environmental Ethics and Logic. Talk about a swift kick in the pants, this has been the week from hell.

Onto the Boat!

I'm on my way out the door right now to start on cutting the sides of the timbers (like frames, but this is a unique boat.) Check out these pictures:


Here I am cutting out the timbers and the cleats.


This is an important process and can be very tedious. It is important to measure twice so that you can cut once. I understand this concept, but sometimes am reluctant to apply it. 

I made some smaller saw horses about 3 feet off the ground. I'm gonna use those as the boats main resting place. From here I will finally cut out that bottom shape, and then apply the 4" rocker to it. The rocker is a slight curve to the bottom. This was usually done by bracing boards to the ceiling and applying pressure downward, giving it a convex shape (concave depending how you look at it.) But the ceiling in this building is 30 feet tall so that's a no-go. Instead I will be using a complex system called cinder-blocks. I'm just gonna pile a bunch on to make it sag in the right spots.

Small sawhorses, or sawponies
I really need to cut out the bottom, but I'm kinda having analysis paralysis on what hardware to buy. I mean, everyone uses silicone bronze ring nails, but they are expensive! I find it hard to believe that with all the technology we have that those are the only option. What about deck screws? Those withstand the elements, so you would think, but I don't want to take a chance before I know.

Anyways, off to Home Depot and then to the shop.

Tell a friend, tell an enemy, tell anyone.


Thursday, October 7, 2010

The Dory Has Started!!!

It has begun...

I guess this is like the sonogram?
My beautiful little dory zygote. Can you see the resemblance?

This wonderful day marks birth of my 12' Banks Dory. But is the true beginning when I started reading and planning? (conception?) How many more birth of a child allusions can I make about this? I'll stop, I'm starting to get nauseous, if you want to see why, check out this blog post of mine.

I have started the bottom. It is just three simple 1''x12" planks (2-12' and 1-16') laid edge to edge and clamped together for sealing and for joining (via 1''x2" oak cleats). Take notice of the pictures; this is my workspace at A&M Galveston. You can see I have some sawhorses set up, I have a 4'x8' sheet of plywood as a workbench type arrangement (also has the sheer plan lofted on it for easy reference), and on the floor I have my clamp set-up. 

I really got a lot of work done today. The hardest part of any project is the beginning. It has so many factors, it's like cooking. You gotta get the recipe, chop everything up, call your mom to ask her what she does to make it taste so good, chop up all the vegetables, find the right pan, etc.. So many things to do at the beginning-makes you wanna order a pizza. But, you know if you put this effort into it, you are gonna get something out of it that is way better. Also, you won't get fat (man, I'm on a roll with metaphors today). My point is, the prep work sucks, and maybe even the main effort work is bad too, but when it's all said and done, I will be happy I did it.

I mentioned my clamp system, here it is...

3 boards edge-joined
Wedge clamp (Gardner Inspired)


Pretty straight forward idea.

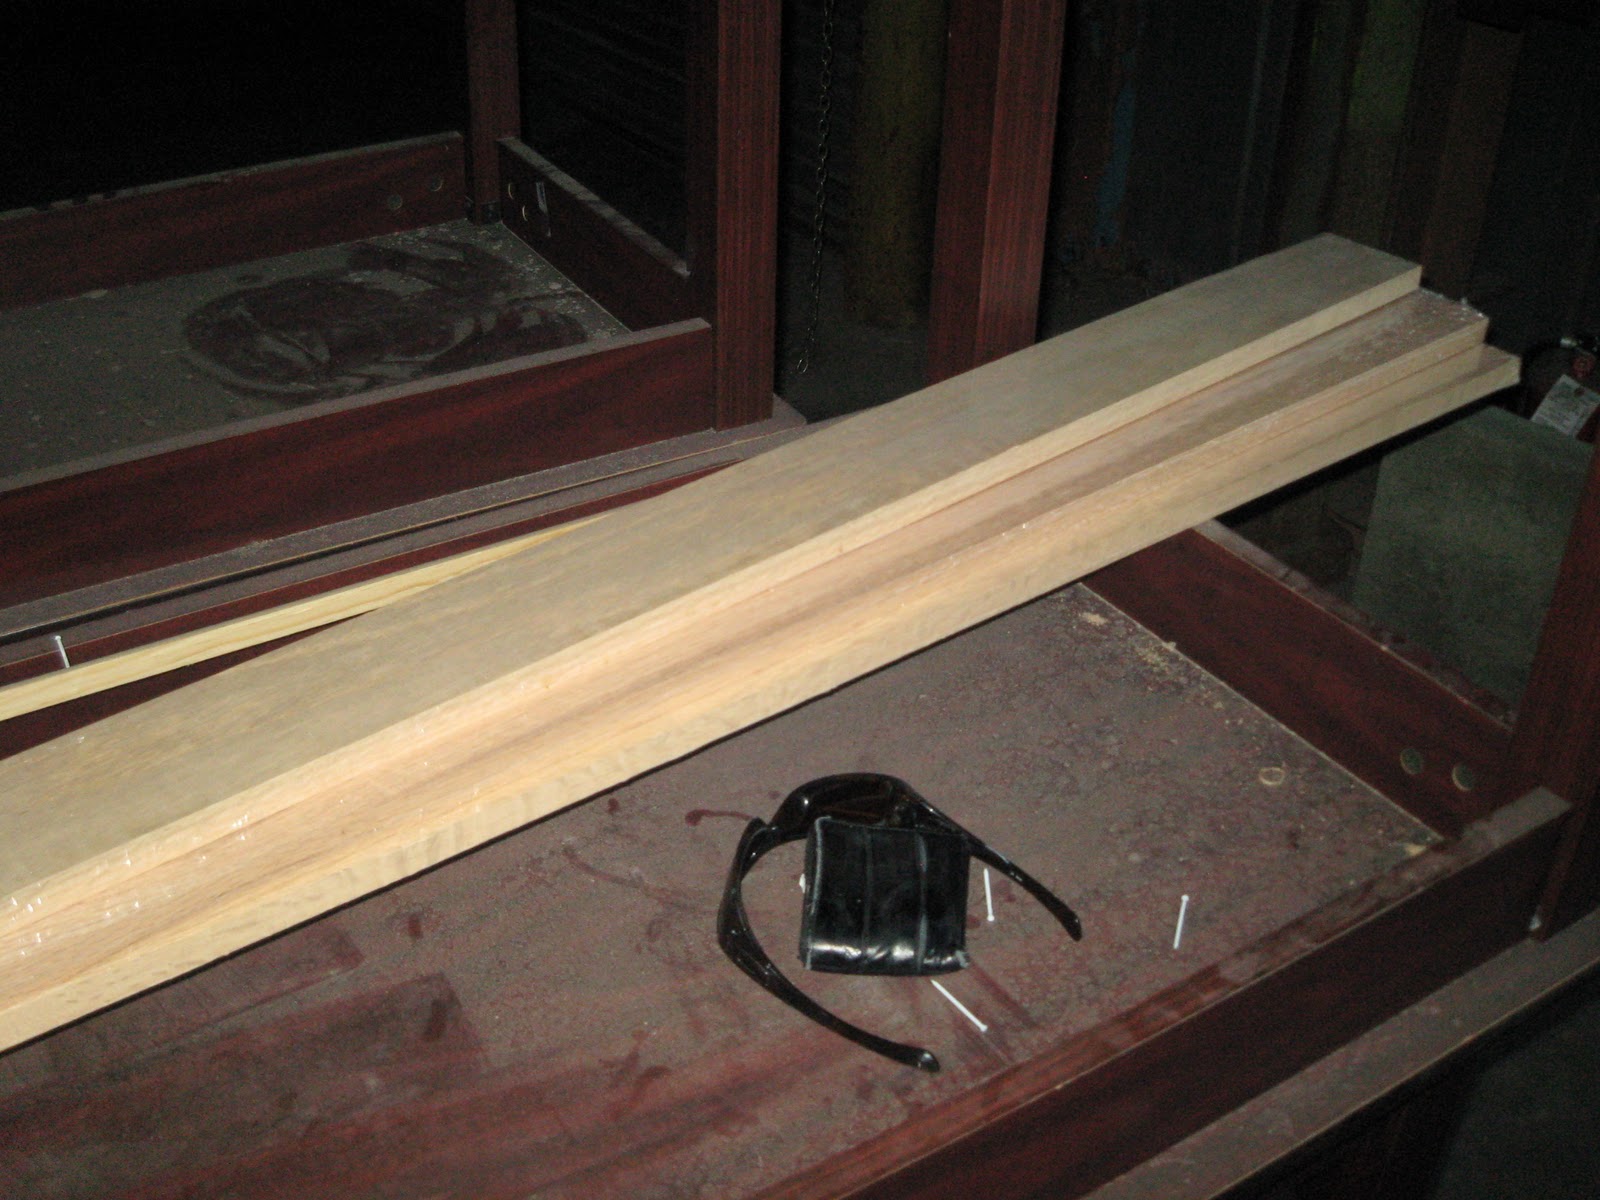
Right now I just have the boards sitting there, I really need the oak to finish it, but just not in dimensions that I am happy about. I really need 1''x2'' of oak, but in this day and age it is really hard to find it. I mean, it does say on it 1''x2'' but it is actually 3/4''x1 1/2''. That is not bueno for me. I am sacrificing on bottom size (3/4'' instead of 1'') but I don't want to do that for the structural cleat. Actually, I'm not so worried as much about doing that for the cleats, but the frames I feel if they are reduced in thickness, it will make them weaker. 

Wanna see 60 dollars?

Notice my diminished wallet size, cowering behind my sunglasses


That's what 60 bucks looks like. Three 8' red oak 1''x2''s, not that impressive eh? Ya, I feel ya on that one. These little oak boards are so presumptuous. They are wrapped in shrink wrap, super expensive, but nowhere near the size I really want, oh, the arrogance.

Enough about that, on to cooler things.

I would like to thank Skip Leveille for referring me to Jimmy Tarantino who referred me to Geno Mandello, a Master Dory Builder. These men are all part of International Dories. They have a program up in Gloucester (dory Mecca) where they build, race, and row dories. It's a real cool, grass-roots type of thing, check it out because the website can explain it better than me. Anyways, Geno answered a few dory questions for me regarding fasteners and sealants- my thanks to him. It's nice when you can talk to these guys who eat, sleep, and breathe boats, especially when they can lend some wisdom.

Until next time, tell your family, tell your friends, tell everyone...

Questions? Email Me

Please click on ads, this stuff is getting expensive,

~Brett~

Friday, September 17, 2010

My Dory Model is Ready to Hit the Runway!

Aaaarrrggghhhhh! Sunday is National Talk Like a Pirate Day so I hope y'all are ready to growl and spit your sentences at people all day long. But if you can't talk like a pirate, just use a lot more profanity and you're covered.

Ok so tonight I finished the main phase of my boat model, WOOT!


Ain't she a beauty? No, She's not? How dare you! If you were one of those people who thought "Man, that model is uglier than a bridge troll who has been beaten with a bag of hot nickels..." then you are correct. This model is ugly. Maybe one day when I am 200 years old, retired and am looking for any reason to ignore my wife, I can create a spectacular replica. Instead I am 26, have the attention span of a field mouse, and am in a room filled with way too many shiny objects, so for me to accomplish this I deserve something along the lines of a Nobel Prize (Hey they have been handing them out for nothing the last few decades, why not me?) BUT, that is the point. This model IS ugly. It isn't built for beauty, it's a functional model. 

Functional you might ask? How are these functional? Well, I'm gonna give you a list just on the things it has helped me with:

  1. Visualize my offsets
  2. Made sure they were correct
  3. Checked all around measurements to verify they are correct (Even John Gardner recommends checking well-known boat plans)
  4. Provides a way to make a reasonably close estimate for the length of all your strakes from garboard to sheer (more on that later)
  5. Allows you to ensure frames match the beveling on the rockered bottom to better receive the garboard
  6. Helps with the concept of the bevel at both the stem and transom
  7. Provided a small scale lofting and construction operation so that I can address a lot of logistical issues (I would rather screw up the balsa wood than the white pine or oak)
  8. Kept my sanity (or made it worse, meh)
  9. Etc.
There are many many, many, many more benefits than just this. Models are even greater help with a boat that has a very curvaceous bottom (ooh la la). In fact, shipwrights used to make wooden models 1:8 scale and would pull the waterlines off of it to use in the construction. Making a model was the great grand daddy of CAD (computer aided design) programs. 

Notice on my model, on what should be the frames, I have made them a solid piece all the way across. I did this for structural reasons and so when my cat (soon to be a ship's cat!) bats it off the table, it won't break as easily. It also really helps visualize what the boat will look like. To be honest, mine now has me worried that the 4th station lines are incorrect because there is not a "fair" curve between everything. This is a great example of how it helped me solve a large-scale problem. So, I will go back, check and recheck my numbers, measurements, and all else to find out where the problem is. Better to do it with balsa wood and a hobby knife than white pine and a hand saw...

Ok, no more model talk.

I would like you to check out this guy's website: The Unlikely Boat Builder

This dude has a pretty cool gig going on. He one day just decided to start building boats and he had zero experience. This obviously didn't matter because he has done some really awesome things. This is providing some great info for me and some extra motivation. 

Thanks for stopping in gulls and buoys (yuk yuk, nautical joke hurrah!)

If you like what you see, become a follower, leave a comment, post a link to this site somewhere, tell some friends, whatever you can do to help with the revolution of the Neptune Nation...

Fair winds, strong rum, sharp knives, dry socks,

~Brett~